
An anvil is one of the most important pieces of equipment used in blacksmithing. The device works as a stable surface for working metal components. An anvil is essentially a metallic block with three work surfaces used to shape metal components in many ways.
In the early days, anvils were basically made of stone slabs used to shape metallic objects. With the evolutions of functions, anvils were designed with sturdier materials such as bronze and iron.
Modern-day anvils are engineered using steel and designed to suit various applications. This post covers everything you need to know about anvils from a beginner’s point of view.
Contents
What is an anvil?
The two most notable blacksmithing tools are the anvil and hammer. An anvil is a piece of metal used as a working surface. It is primarily designed to offer a sturdy working platform against which metal components are forged.
The most common anvil weight should range between 20 and 500 pounds. Whichever type and the weight you choose should depend on your intended use.
Types of Anvils
Anvils are designed in a wide variety of shapes and sizes. As much as they are engineered simple looks, they still serve different purposes, depending on their types and sizes. The most common types of anvil are stake anvil, bench anvil, forging anvil, farrier anvil, and jeweler’s anvil.
Part of an Anvil
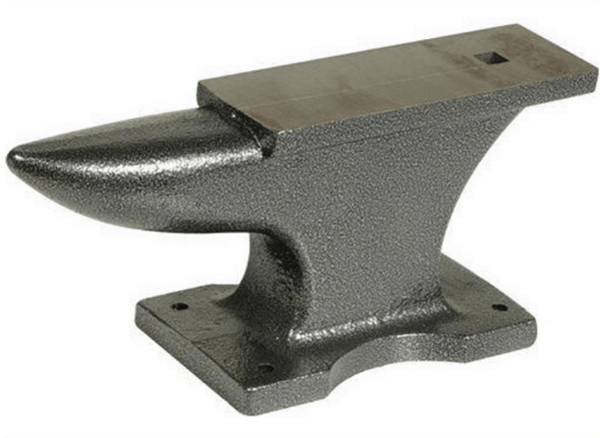
An anvil comprises different components used to serve various purposes. Even though anvils come in different types, they all have the same components. Here are the main components of an anvil:
Anvil Face
The face is a flat surface found at the top of the anvil. The surface is used as a sturdy platform for forging metal items. The face is the most used part of an anvil. The face must be designed as sturdier as possible to withstand heavy striking without deformation.
Anvil Horn
The horn is the pointed part of the anvil. This end resembles a horn and is meant to shape metallic items to give them a round shape. The horn is not as sturdier as the face because it is never hit with a hammer. Instead, the horn is primarily used to bend items.
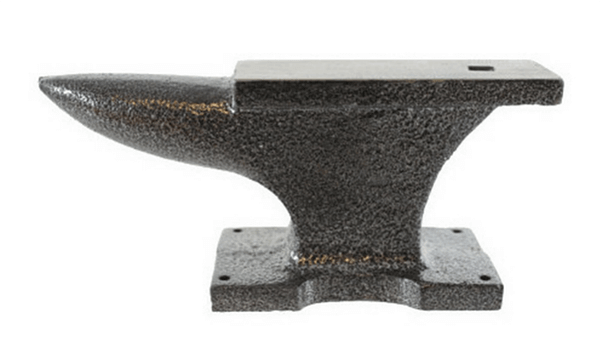
Anvil Table
Also known as the step, an anvil table is a narrow flat part found between the anvil face and horn. The height of the anvil table is slightly raised than the horn and lower compared to the face. The edges of the anvil table are used as cutting points. However, the table tends to wear out faster if used frequently.
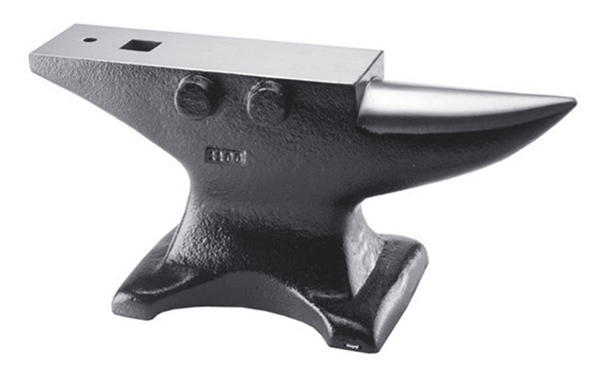
The Hardie Hole
The Hardie hole is a component found between the face surface and the heel. The Hardie hole is square and is used to hold different pieces of equipment, such as a chisel. The Hardie hole helps secure other blacksmithing tools and can also be used to bend metal pieces.
The Pritchel Hole
This hole is used for the same purposes as the Hardie hole. However, the pritchel hole is circular. It is primarily used to punch holes into metal items.
Factors to Consider When Buying the Anvil
Anvils are designed with the same features. However, buying an anvil requires considerable attention to some details that may make or break your blacksmithing project. You should know what to look out for before making a decision. Here are some essential considerations to keep in mind.
Material
The anvil material determines its performance and durability. Back in the day, anvils were made of stone slabs, iron, and bronze. Nowadays, steel is the most used anvil material. Steel is becoming a popular choice because it has favorable properties and can be produced in bulk. Therefore, steel anvils are the most common and preferred.
Another notable anvil material is cast iron. Cast iron anvils tend to be brittle and may not offer a sturdy face compared to steel anvil. This means you may not hit a cast iron anvil as hard as you would hit a steel anvil.
Intended Use
How you want to use the anvil determines the type to buy and the anvil material to choose. For instance, if you want to use the anvil to make something for your own use, you may want to consider smaller and more affordable ones.
However, if you want an anvil for industrial application, you should opt for more customized and specialized options. These types are more versatile and tend to serve a wide range of purposes.
Weight, Shape, And Size
The shape and size are essential because they can help you determine possible usage. For instance, the size of the anvil determines the size of material you want to forge and other pieces of equipment you will use in the process.
On the other hand, the weight of an anvil determines the ease of use. For instance, the easiest anvil to use is often the heaviest. Its shape will vary depending on its intended use.
Cost
The cost of an anvil is essential, especially if you are on a budget. In most cases, the anvil price will depend on its material and size.
How Is an Anvil Made?
Anvils are made through forging or casting.
Forging is achieved by compressing a metal into shape. In most cases, a hammer or die is used to hit the material to give it the desired shape. Forging results into anvils with higher strength and can withstand hitting or striking.
On the other hand, casting involves heating a material through extreme temperatures until it is molten. The molten form is then poured into a mold to create the desired item. The mold is then cooled until it solidifies. Casting tends to be more cost-effective than forging.
A forged anvil will always possess superior quality than cast anvil. This is mainly due to the sturdiness and toughness acquired during forging. Forged anvils are also more durable and tend to be costly than cast anvils.
Testing an Anvil
The quality test for an anvil can take different forms. Some of the most used tests include the steel ball test and hammer rebound test. These tests are explained below.
a. The Steel Ball Test
What You Need:
- Steel ball
- A ruler
- The anvil
Test Procedure
- Raise the steel ball at about 20 cm above the anvil and let it drop.
- Repeat the process in different places.
If the steel ball rebounds higher, the quality of the anvil is guaranteed. The higher the rebound, means more superior quality and hardness. You are advised not to throw the steel ball but rather let it drop off your hands to the anvil for more accurate results. The steel ball test is not often the ultimate anvil quality test.
b. The Hammer Rebound Test
What You Need:
- A3 lb hammer
- The anvil
Test Procedure
- Set the hammer over the anvil’s centre with the handle parallel to the face.
- Drop the head of the hammer towards the anvil.
- Observe the rebound.
If the hammer rebounds higher, this is an assurance of the anvil’s quality and hardness. Again, ensure you do not strike the anvil. Instead, let the head of the hammer drop effortlessly for more accurate results.
Keeping the Anvil
The anvil is a known forging tool. Due to its usefulness, it is essential to keep the anvil in the right place at the workshop. In most cases, you will need to have the anvil in a central position to create more space for movements.
Additionally, you should consider having the anvil closer to the forge. This will help minimize the time you take to have an item out of the forge and on the anvil for hammering. The distance between the two should depend on the size of the item you are forging and your project.
Considering the position of the horn, you should decide the direction that suits your needs. For instance, where the horn faces depends on the hand you use to hold the hammer and the tongs. It is advisable to have the horn in the direction of the hammer. This will allow you to hit the material without interfering with the face. The position also gives you a better reach.
Accordingly, ensure that the hardy hole is position on the same side as the tong. This will allow you enough space to hit with the hammer without putting a strain on your knuckles.
Determining the Height of the Anvil
The anvil height is essential if you want to reduce the risks of injuries. Raising the anvil too high or too low may lead to straining when hammering. Additionally, hammering requires endurance and strength. If the anvil is raised too high or low, you will likely use too much energy when hammering than when it is appropriately positioned. You do not want to hit the material in a position that drains your energy, especially if you are working on many pieces.
The best way to determine the proper height for your anvil is by standing by its side. Ensure your feet on either side. Use your fist to determine the height. Generally, the anvil should be raised to the height of your hand when standing. In most cases, this should be somewhere slightly above your knees.
The proper height will also make the anvil more stable and safer. More giant anvils are easier to stabilize than smaller anvils. For instance, you may need to wrap the chain around the neck of the anvil to add more weight for stability.
Mounting an Anvil
There are many ways you can use to mount an anvil. However, the most manageable and straightforward way is to use railroad spikes for mounting it on a stump. In this case, the railroad spike head will pull down the anvil feet’s edge for more stability.
You should consider the size of the stump to use depending on the size of your anvil. A larger anvil requires a heavier stump.
Silencing an Anvil
Hammering an item on an anvil can be very loud. The level of noise can sometimes become unbearable for human ears. That is why it is essential to consider ways of making the anvil quieter. The most common way of reducing this noise is by having ear protection or noise-canceling wearable to cover your ears. However, you can also make the anvil quiet.
The best way to make the anvil quieter is by having a chain around its neck with magnets on it. However, you should note that this method will reduce the noise but will not do away with it altogether. Accordingly, it is easier to reduce the noise from a smaller anvil than a larger anvil.
Best Anvil Alternatives
Anvils can be costly. Therefore, it is always essential to have an alternative in case you cannot afford this tool. A high-quality anvil is hard to find in the market, and if you do, you will have to fork out a considerable amount for it.
If you are looking for an alternative to your desired anvil, consider the strength, shape, portability, hardness, and stability.
Instead of an anvil, you can also opt for a large steel block as a makeshift anvil. However, this may not work as effectively as an anvil. Other alternatives include scrap metal, sledgehammer head, and railroad track.
The best anvil alternative in today’s market is the railroad track. The railroad track is designed from carbon steel, making it sturdier and tougher. This hardness is essential when hitting stuff on the surface because you need the endurance to prevent deformation. However, finding a railroad track is very difficult, and you may end up with lawsuits if you do not get it from a reputable source. In most cases, railroad properties are often illegal.
The Bottom Line
There are many pieces of equipment that a blacksmith can never miss. Apart from the forge, hammer, tongs, and other essential tools, an anvil is a must-have.
Most people think that all anvils are the same. However much this may seem true, these devices are designed to serve a different purpose and may vary in quality. Additionally, anvils come with a wide range of features that may vary from one brand to the other. Therefore, you must know what makes an anvil superior to another one in the market. This post should help you make an informed decision in case you want to buy an anvil.